rss
email
twitter
facebook

June 25, 2010

How to add a shortcut to open Internet Explorer 8 Inprivate Browsing Mode

To add a shortcut for Inprivate Browsing Mode on the desktop, follow these steps

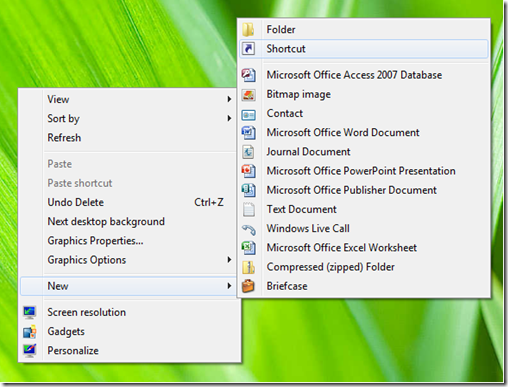
1. Right-click on the Desktop, then click on New and choose Shortcut as shown in figure below.

1

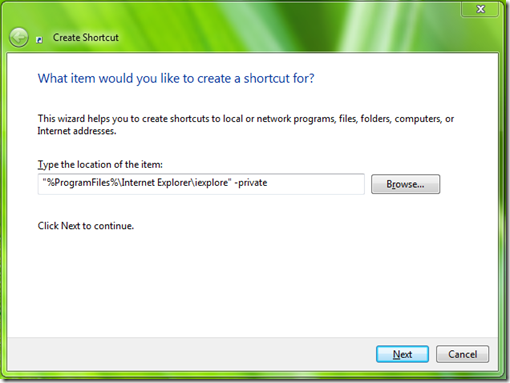
1. Type the Location of the item: "%ProgramFiles%\Internet Explorer\iexplore" -private and Click Next.

2

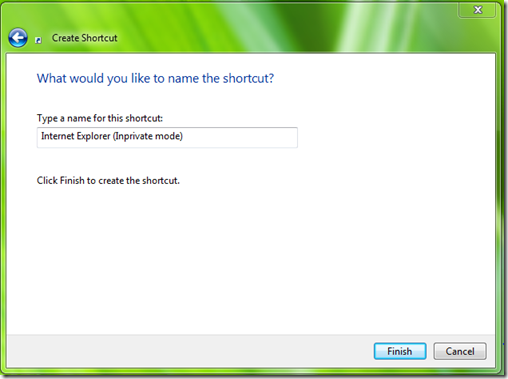
1. Now type a name for the Shortcut. Herein the figure, I’ve given: “ Internet Explorer Inprivate Mode

3

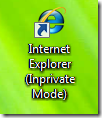
1. Click finish, and you will see a new Internet Explorer Shortcut with the name : “Internet Explorer (Inprivate Mode)”

7

June 20, 2010

How to Call Problem Step Recorder using Command Prompt

In Command Prompt / Run, type in: psr.exe and press enter

June 12, 2010

How to change the Windows 7 Logon Screen

1. In Run, type in: regedit

2. Locate: HKLM\Software\Microsoft\Windows\CurrentVersion\Authentication\LogonUI\Background

3. double-click the DWORD key called OEMBackground (If the DWORD Key is not there, create one with the name: OEMBackground) set the value to 1

4. The Background Image that you want to set as Logon Image, should be below 256 KB in size and resolution should be: 1024x768.

5. Locate: C:\Windows\system32\oobe\info\backgrounds

6. If you are not able to locate the folder, try locating: C:\Windows\system32\oobe

7. Create a Folder with the name: info

8. Now Locate: C:\Windows\system32\oobe\info

9. Create a Folder with the name: backgrounds.jpg

10. Now you will be able to Locate: C:\Windows\system32\oobe\info\backgrounds

11. Put the background image here and rename it as: backgroundDefault

12. Restart the Computer and you will see the change in Background.

How to Generate Power Efficiency Diagnostics Report in Windows 7

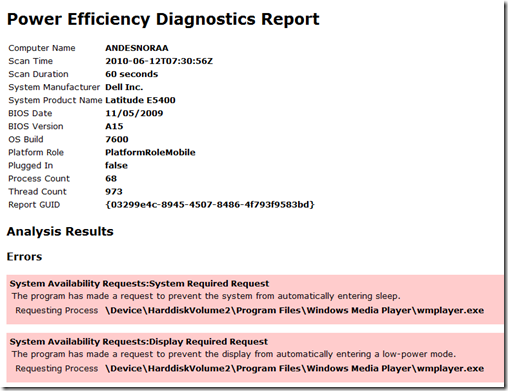
The Power Efficiency Diagnostics Report is a new feature in Windows 7 which helps to find the energy efficiency of your computer. The Powercfg –energy command outputs the Energy Efficiency Report.

1. Make sure your computer is idle and no programs and documents are opened.

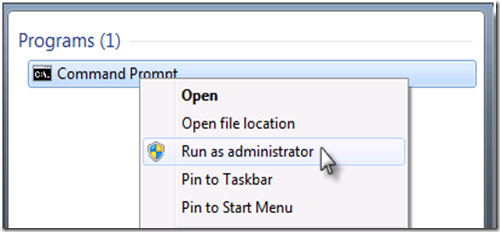
2. Start an elevated command prompt in Windows 7.

1

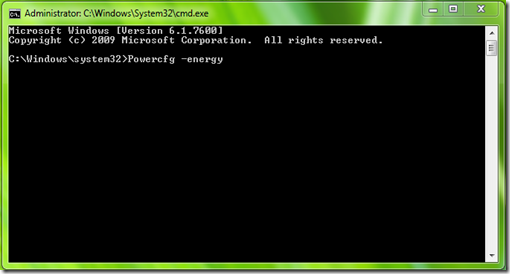
3. Type in : Powercfg –energy in Command Prompt and press Enter.

2

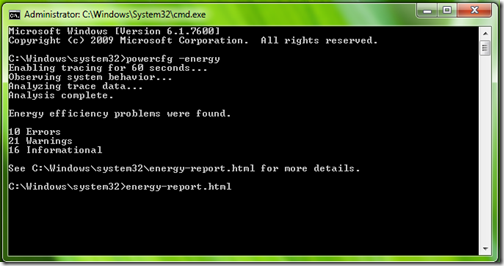
4. Now type in: energy-report.html and press Enter.

3

5. The Energy Efficiency Report will open in your Web Browser.

4

June 11, 2010

How to call Device Manager by using Command Prompt

Accessing Device Manager from Command Prompt is very easy

type in: devmgmt.msc

How to add Copy to Folder option in Context Menu

Copy to Folder Option allows you to copy files from one location to another immediately.

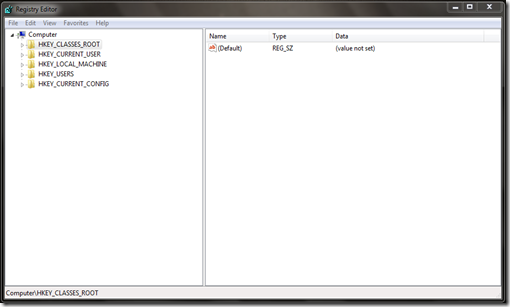
1. Open the registry editor

Capture1

2. Locate: HKEY_CLASSES_ROOT\AllFilesystemObjects\shellex\ContextMenuHandlers

3. In the left pane, right click on ContextMenuHandlers and click on New and Key.   

4.Type {C2FBB630-2971-11D1-A18C-00C04FD75D13} and press Enter.

June 10, 2010

How to Create and Setup Signature in Windows Mail

1. Open Windows Mail.

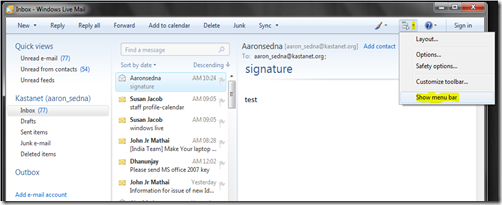
2. By default, the Menu bar is hidden, Activate the menu bar.

-1

3. Once the Menu bar is activated, you will find it on top of the Tool bar as shown in figure below.-3 

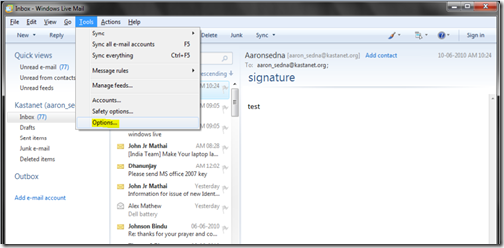
4. From Tools, select Options as shown in figure below.

2

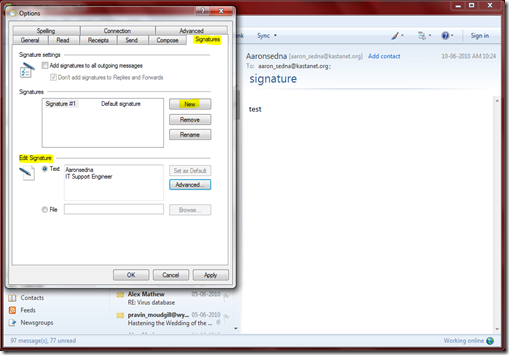
5. You will get an Options window now. From Options window, select the Signatures tab as shown in figure below.

3

6. Now click on New button and under Edit Signature field, enter your Full name and Designation.

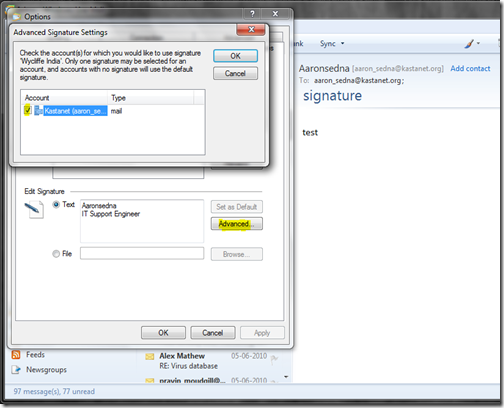
7. Click Advanced button, and choose the mail account for which you would like to use the signature.

5

8. Click Apply and ok buttons to finish setup.

June 8, 2010

How to print file contents of a directory

The following steps will help you to print the directory and its contents with folder paths.

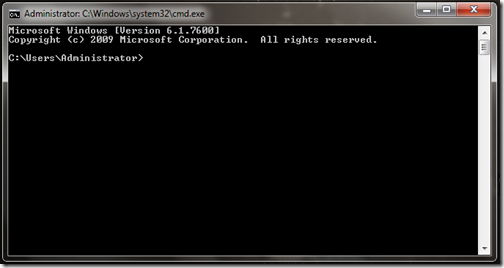
1. Open Command Prompt

0

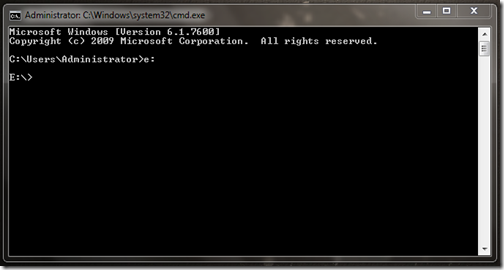
2. Go to the directory for example: if you want to print the contents of E drive, then type in command prompt: E:

3. Press enter

1

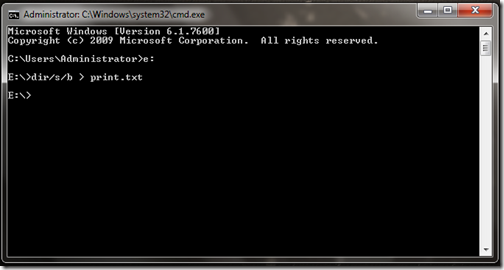
4. In Command Prompt, type: dir/b/s > print.txt

2

5. Go to the E drive and you will find Print.txt (Notepad file)

3

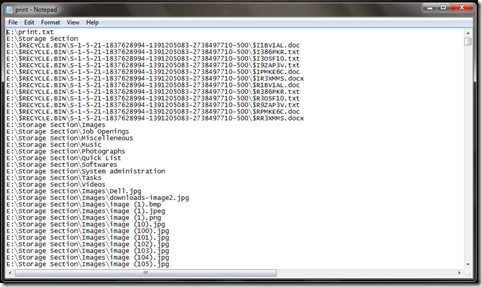
6. Open the print.txt (Notepad File) and you will find the files and folders listed.

4

HOW TO ENABLE ADMINISTRATOR ACCOUNT ON VISTA

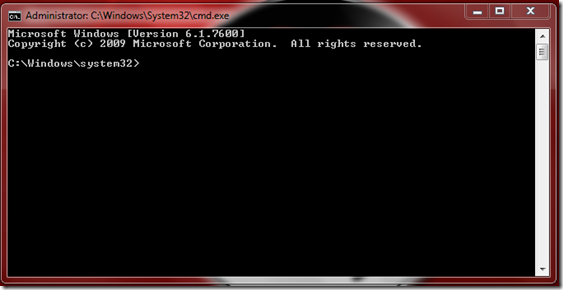
In order to enable the administrative account on vista, you need to access the command
prompt with administrative privileges. For this right click on the command prompt icon and
choose the “run as administrator” option.

Capture1

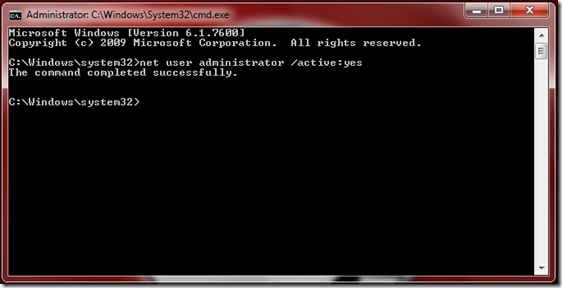
Type in the command: net user administrator /active:yes

Capture2 

The command prompt will show up: The command completed successfully

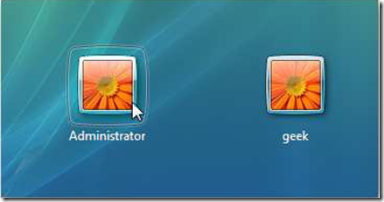
Log out, and you will see the activated Administrator account.

Capture3

If you want to disable the built-in administrative account, you need to login to your Regular User Account
account, and then open an administrator mode command prompt. Type the following
command: net user administrator /active:no


How to upload music files on Playlist.com

1. go to fileden.com, create an account
2. upload the songs from your files,
3. then view song properties
4. copy the URL, then go to: http://www.playlist.com/link/search?searchfor=song
5. then paste the URL into the box and click add!

How to Install and Configure Windows Server 2003 DNS Server

The Domain Name System (DNS) is the Active Directory locator in Windows 2000 and Windows Server 2003. Active Directory clients and client tools use DNS to locate domain controllers for administration and logon. You must have a DNS server installed and configured for Active Directory and the associated client software to function correctly.

Install Microsoft DNS Server

1. Click Start, point to Settings, and then click Control Panel.
2. Double-click Add/Remove Programs.
3. Click Add and Remove Windows Components.
4. The Windows Components Wizard starts. Click Next.
5. Click Networking Services, and then click Details.
6. Click to select the Domain Name System (DNS) check box, and then click OK.
7. Click OK to start server Setup. The DNS server and tool files are copied to your system
8. Continue to the next step to configure the DNS server.

Configure the DNS Server Using DNS Manager

1. Click Start, point to Programs, point to Administrative Tools, and then click DNS Manager. You see two zones under your computer name: Forward Lookup Zone and Reverse Lookup Zone.
2. The DNS Server Configuration Wizard starts. Click Next.
3. If the Wizard does not auto-start, right-click your server name objects in the DNS Manager console and choose Configure your Server.

1

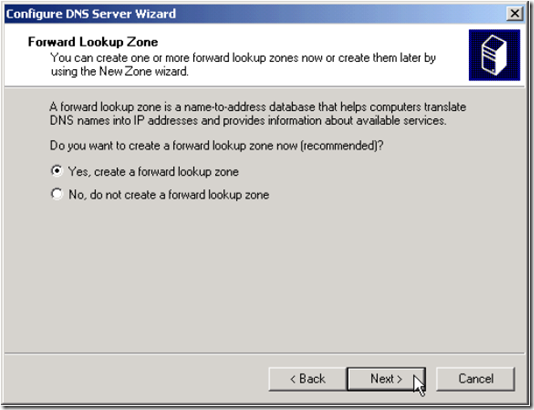
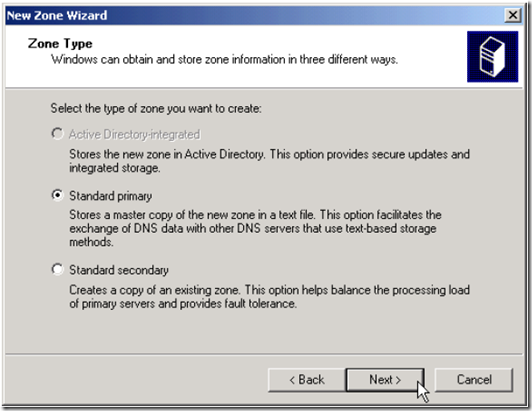
4. Choose to add a forward lookup zone. Click Next. The new forward lookup zone must be a primary zone so that it can accept dynamic updates. Click Primary, and then click Next.
2

3

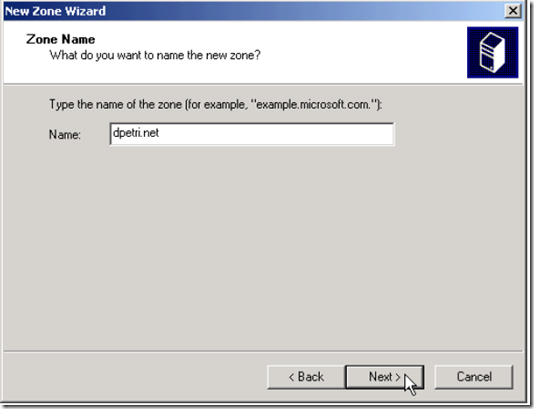
5. The zone name must be exactly the same as your Active Directory Domain name, or, if on a stand-alone or workgroup environment - the same as the suffix for all of the network computers that are to register with this DNS server. Type the name of the zone, and then click Next.
4

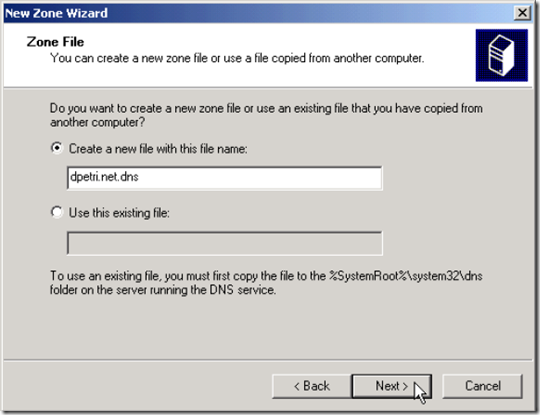
6. Accept the default name for the new zone file. Click Next.
5

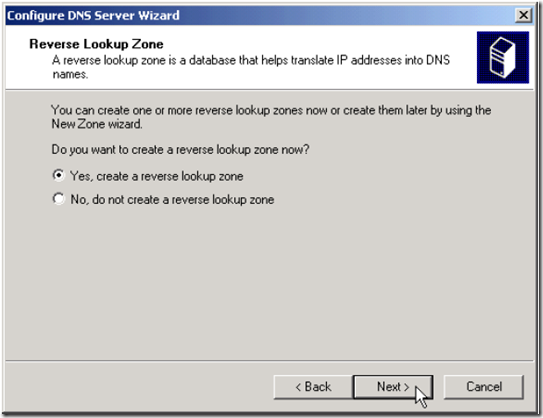
7. Choose to add a reverse lookup zone now. Click Next.
6

8. Click Primary, and then click Next.
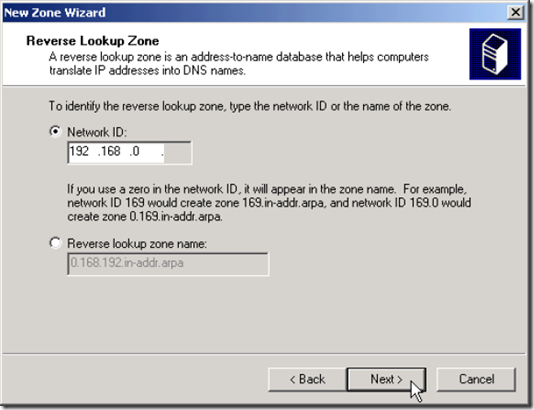
9. Type the name of the zone, and then click Next. The zone name should match the Network ID of your local subnet. For example, if your subnet range is from 192.168.0.1 to 192.168.0.254, type 192.168.0 in the name value.
7

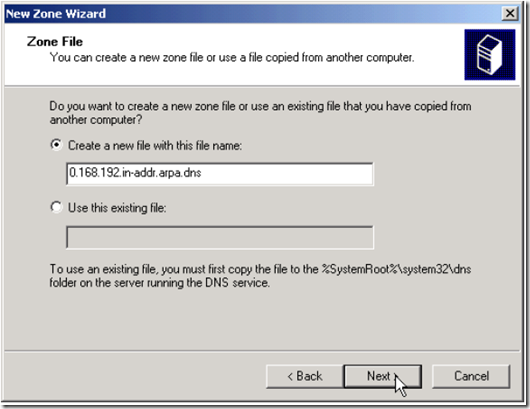
10. Accept the default name for the new zone file. Click Next.
8

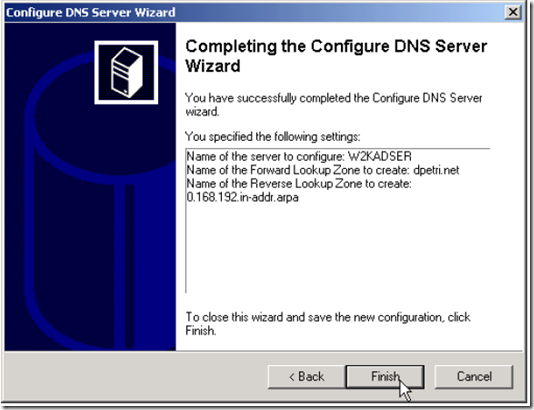
11. Click Finish to complete the Server Configuration Wizard.
9

After the Server Configuration Wizard is finished, DNS Manager starts. Proceed to the next step to enable dynamic update on the zone you just added.